So, you’ve built an amazing app, it’s published on the Google Play Store, and now you’re wondering how to actually get paid for all your hard work. That’s where your Payments Profile comes into play!
While your Google Play Console developer account helps you manage your apps, the Payments Profile (sometimes called your “Merchant Account”) is all about the money—how you earn it, how it’s taxed, and how it lands in your bank account.
Is a Payments Profile Required to Publish?
The short answer is yes. Whether you are giving your app away for free or charging a premium, a Payments Profile is no longer optional.
In recent years, Google has tightened its verification rules. Even for a 100% free app, you need a profile to verify your identity. This helps Google ensure that every developer is a real person or a legitimate business, which keeps the Play Store safer for everyone.
What Does Your Payments Profile Actually Do?
Think of your developer account as your storefront, and your Payments Profile as the cash register and the back-office accounting department. Here are its main jobs:
- Receiving Your Earnings: This is the big one! Your Payments Profile holds the banking details where Google sends your revenue from paid apps, in-app purchases, and subscriptions.
- Identity & Tax Verification: To keep things legal, your profile stores your legal name, address, and tax ID. For Canadian developers, this means complying with local tax rules like GST/HST.
- Managing Sales and Refunds: If a customer needs a refund or you want to track your sales history, this is your hub. You’ll also find your monthly payout statements here.
- Customer Payment Clarity: You can set the “Credit Card Statement Name” here. This is the text users see on their bank statements (e.g.,
GOOGLE* Your App Name), which helps reduce confusion and accidental chargebacks.
Free Apps vs. Paid Apps: What’s the Difference?
The level of detail you need to provide depends on how you plan to monetize.
| Feature | Free Apps Only | Paid Apps & In-App Purchases |
| Profile Purpose | Identity verification & registration fee. | Payouts, taxes, and transaction management. |
| Bank Account | Not strictly required for payouts. | Mandatory (must be a Canadian bank for Canadian profiles). |
| Tax Info | Basic details. | Mandatory (SIN for individuals or Business Number for corps). |
Important Tips for Canadian Developers
Setting up your profile correctly from the start can save you a lot of headaches later.
- Individual or Business? You must choose one when you start. This choice is permanent and dictates how you’re taxed. If you’re a freelancer, “Individual” usually works; if you’ve incorporated, choose “Business.”
- The Address Match: Your legal address in the profile must match the address on your government ID or business registration. If there’s a mismatch, Google might pause your publishing rights until it’s fixed.
- One-Time Linking: Generally, you can only link a Payments Profile to your developer account once. It is very difficult to change this later, so double-check your details before hitting “Submit.”
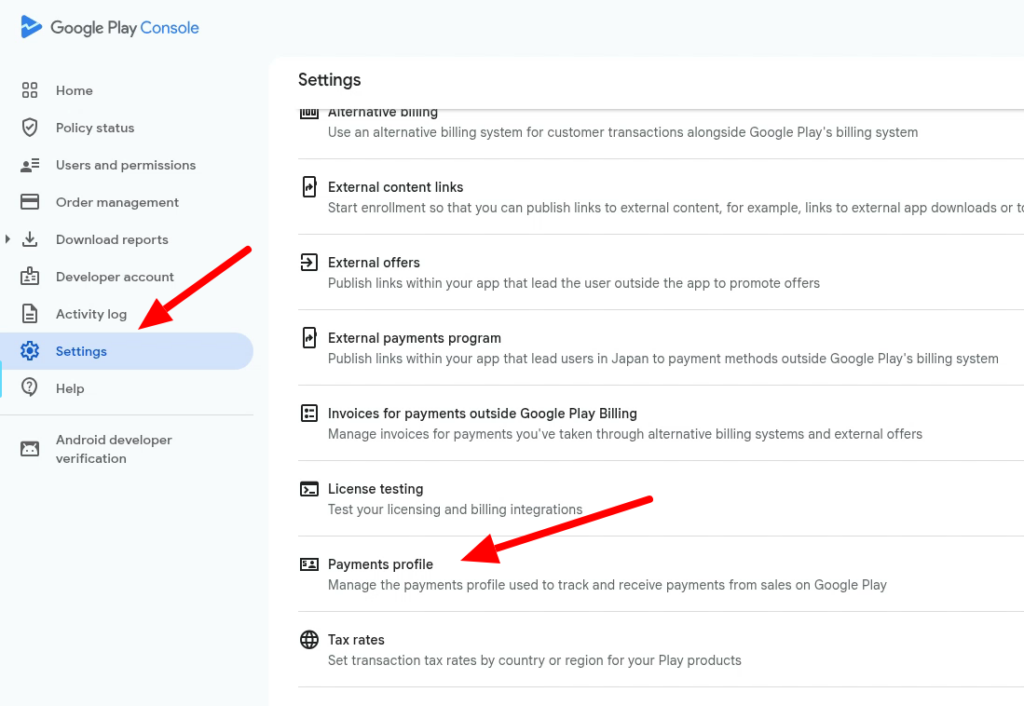
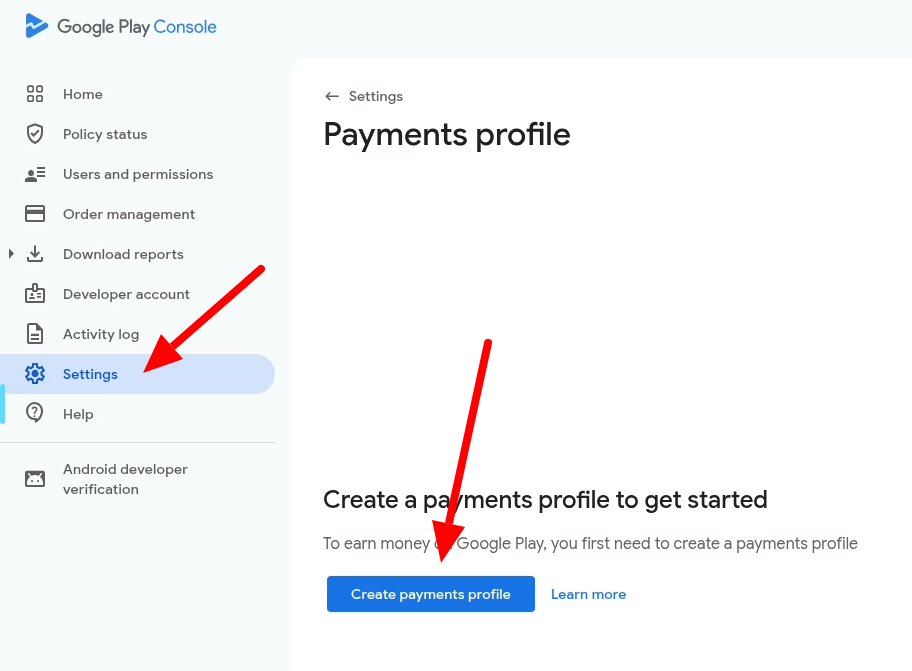
Where to Find It
Ready to get started? Log into your Google Play Console, go to Settings in the left-hand menu, and select Payments profile.